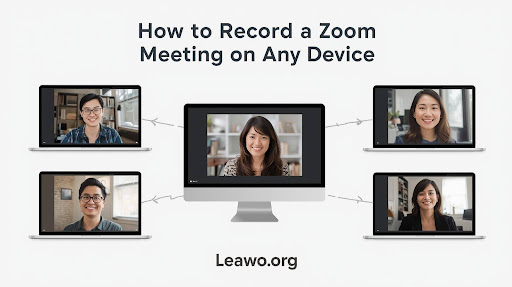
How to Record a Zoom Meeting on Any Device
Introduction
Recording Zoom meetings helps you save important conversations. You can review key points later. You can share meetings with people who missed them. Many professionals record training sessions and webinars. Students record online classes for studying. The process is simple once you know the steps. This guide shows you how to record on any device. You will learn desktop and mobile methods. We cover permissions and troubleshooting too.
Preparing to Record: Settings & Permissions
Check your permissions before recording. Only hosts can record meetings by default. Free accounts record to local storage only. Paid accounts can record to the cloud. Ask the host for permission if you are not hosting. The host can allow participants to record.
Open Zoom settings on your computer. Click the Settings icon in your profile. Find the Recording tab on the left. Enable local recording or cloud recording. Choose your preferred storage location. Set up automatic recording if needed. Some organizations restrict recording features. Contact your IT admin if options are grayed out.
Always inform participants before recording. Many regions require consent for recording. Zoom shows a notification when recording starts. This protects everyone’s privacy. Be respectful of sensitive conversations.
Step-by-Step: How to Record Zoom on Desktop
Recording on desktop is straightforward. Join or start your Zoom meeting first. Look at the bottom toolbar. You will see several control buttons there.
Click the Record button on the toolbar. It looks like a circle inside a circle. Select “Record on this Computer” for local storage. Choose “Record to the Cloud” if available. A red recording indicator appears on screen. This shows the recording is active.
Pause recording anytime by clicking the button again. Resume when ready by clicking once more. Stop recording when the meeting ends. Click the Stop Recording button in the toolbar. Zoom converts the file automatically after the meeting.
Find your recording in the Zoom folder. Open Zoom and click Meetings. Select the Recorded tab at the top. Your video appears here when processing finishes. The file saves as MP4 video format. Audio saves as M4A format separately.
Third-party tools offer more features. Leawo Free Screen Recorder provides advanced recording options. You can capture specific screen areas. It includes editing tools too. CleverGet Recorder works for multiple platforms. These tools help when Zoom features are limited.
How to Record Zoom on Mobile Devices
Mobile recording works differently than desktop. The host must enable cloud recording first. Participants cannot record locally on mobile apps. This is a Zoom limitation on phones.
Open the Zoom app on your iPhone or Android. Start or join your meeting as usual. Tap the screen to show controls. Look for the More button (three dots). Tap it to open the menu.
Select Record to the Cloud option. The recording starts immediately after confirmation. A recording indicator shows at the top. This lets everyone know recording is active.
Stop recording before ending the meeting. Tap More again and select Stop Recording. The file processes after the meeting ends. Access recordings through the Zoom web portal. Log in to zoom.us on any browser. Go to Recordings in the left menu. Download or share your recordings from there.
Mobile recording requires a paid Zoom account. Free users must record from a computer. Consider upgrading if you record meetings often.
Sharing & Managing Your Zoom Recordings
Access recordings through the Zoom app or website. Local recordings save to your computer folder. Cloud recordings appear in your Zoom account. Managing recordings keeps your storage organized.
Share recordings with specific people easily. Open the recording in your Zoom portal. Click the Share button next to the file. Copy the link and send it securely. Set password protection for sensitive meetings. Add expiration dates to limit access time.
Download recordings to your device if needed. Click the Download button for each file. Save them to external drives for backup. Delete old recordings to free up space. Cloud storage has limits on free accounts.
Organize recordings with clear naming conventions. Rename files with dates and topics. Create folders for different projects. This makes finding recordings easier later. Edit recordings before sharing if necessary. Trim unnecessary parts from the beginning or end.
Troubleshooting Common Problems
Recording issues happen sometimes. The Record button might be grayed out. This means you lack permission to record. Ask the host to enable recording rights. Check if your account type supports recording.
Recording files may not convert properly. Wait a few minutes after the meeting ends. Zoom needs time to process the recording. Check your internet connection during meetings. Poor connection affects recording quality.
Storage space issues prevent recording too. Free up disk space on your computer. Delete old files or move them elsewhere. Cloud storage fills up with frequent recordings. Upgrade your Zoom plan for more space.
Audio might not record correctly sometimes. Test your microphone before important meetings. Check Zoom audio settings in advance. Ensure you select the right audio source. Video quality looks poor in some recordings. Adjust video settings to higher quality. Close other programs to improve performance.
Conclusion
Recording Zoom meetings is a valuable skill now. You can capture important information easily. Desktop recording offers the most features. Mobile recording works for basic needs. Always check permissions before you record. Respect privacy and get consent first. Manage recordings to stay organized and save space. Troubleshoot issues with simple fixes. Practice recording to build confidence. Your recordings become useful resources over time. Start recording your next Zoom meeting today.