How to Use iTop Screen Recorder for PC: A Step-by-Step Guide for Flawless Recordings
In today’s digital world, the ability to capture what’s happening on your screen is more valuable than ever. Whether you’re a content creator crafting the perfect tutorial, a gamer looking to save your epic victories, a remote worker documenting a process, or a student recording an online lecture, a reliable screen recorder is an essential tool.
Enter the iTop Screen Recorder. This robust, user-friendly software has gained a strong following for its powerful features, clean interface, and, best of all, its completely free core functionality. If you’ve downloaded iTop Screen Recorder but aren’t quite sure where to start, you’ve come to the right place. This step-by-step guide will walk you through everything you need to know to capture your screen like a pro.
Download and Install
First things first, you need to get the software onto your PC.
- Navigate to the official iTop website’s download page for their screen recorder. It’s crucial to download from the official source to avoid any unwanted software bundles.
- Click the download button. The installer file (usually a .exe) will be saved to your computer.
- Double-clicking the downloaded file will launch it.Follow the on-screen installation prompts. The process is straightforward and should only take a minute.
Familiarize Yourself with the Interface
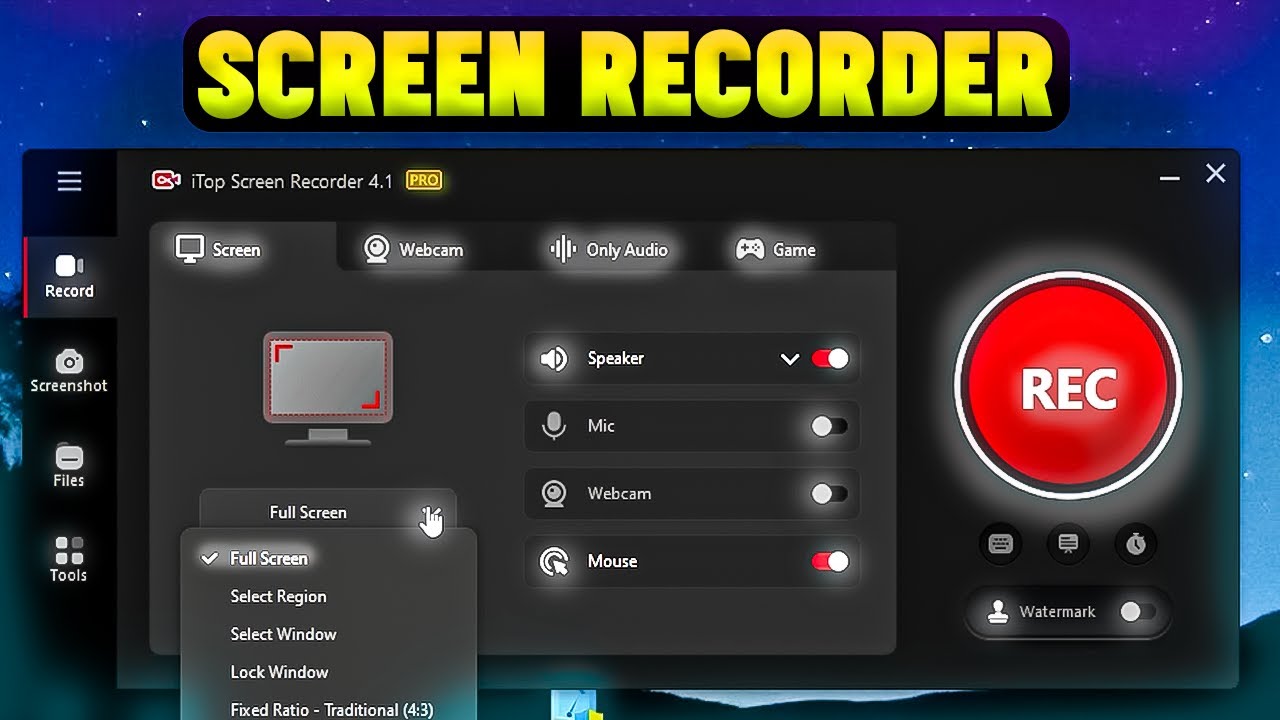
Once installed, open the iTop screen recorder for PC . You’ll be greeted by a clean, compact, and intuitive control panel. Don’t be fooled by its simplicity; this little window is your command center. The main options you’ll see are:
- Video Recorder: The default mode for capturing your screen.
- Game Recorder: A specialized mode optimized for capturing high-frame-rate gameplay.
- Webcam: The ability to capture only your webcam stream.
- Audio Recorder: A tool for recording system sound or microphone audio separately.
- Settings (Gear Icon): Where you can configure all your preferences.
Configure Your Settings (The Key to Professional Results)
Before you hit record, it’s wise to take a quick trip to the Settings menu. Click the gear icon. Here are the key areas to check:
- Video Settings: Choose your preferred video format (MP4 is recommended for its compatibility), quality (Higher = larger file size), and frame rate (30 FPS is standard, 60 FPS is for smoother motion like gaming).
- Audio Settings: This is critical! Ensure the correct microphone is selected for your voice commentary and that “System Sound” is enabled if you want to record audio from your PC (e.g., game sounds, browser audio). You can adjust volume levels here to balance your voice with the system audio.
- Mouse Effects: You can choose to highlight mouse clicks, show a spotlight around your cursor, or add a custom cursor to make your recordings easier to follow.
- Hotkeys: Familiarize yourself with the default keyboard shortcuts for starting/stopping recording and pausing. These are lifesavers during a recording session.
The Main Event – Recording Your Screen
Now for the fun part. Let’s walk through a standard screen recording.
- Select Your Capture Area: Click the “Video Recorder” button. Your screen will dim, and you’ll be able to select the area you want to record. You can choose:
- Full Screen: Captures everything.
- Application Window: Identifies and chooses an open window (such as PowerPoint or your browser) intelligently.
- Custom Area: Click and drag to draw a box around any specific part of your screen.
- Check Your Audio Sources: On the control bar, you’ll see icons for System Sound and Microphone. Make sure they are enabled (not crossed out). You can click them to toggle them on/off right before recording.
- Hit Record: When you’re ready, click the big red “REC” button. You’ll get a 3-second countdown, and then the recording begins!
- Use the In-Recorder Tools (Annotation Bar): Once recording, a handy annotation toolbar will appear. This is incredibly useful for live demonstrations. You can:
- Draw on your screen with different colors.
- Add arrows, shapes, and text to emphasize points.
- Use a spotlight or highlight tool to focus viewer attention.
- Quickly pause and resume your recording.
Ending and Saving Your Recording
When you’re finished, click the red stop square (or use your designated hotkey, like F9).
Immediately after stopping, the recording will automatically open in the built-in Preview Window. This is where you can:
- Watch your video: Review what you just captured.
- Trim the video: Cut off any unwanted time from the beginning or end. This is a fantastic time-saver.
- Save it: Click “Save” to choose where on your computer you want to export the final video file.
Pro Tips for Mastering iTop Screen Recorder
- Plan Your Recording: Write a quick script or outline. It reduces “ums” and “ahs” and makes for a cleaner, more professional video.
- Clean Your Digital Workspace: Close unnecessary tabs and applications. Notifications can pop up and ruin a perfect take.
- Make Use of a Good Microphone: The quality of the audio is equally as crucial as that of the video. Your recordings can be significantly enhanced with a good USB microphone.
- Leverage the Pause Feature: Made a mistake? Instead of stopping, just pause. Collect your thoughts, reposition your windows, and resume. iTop will stitch it all together into one seamless video.
- Explore the Game Mode: Even if you’re not a hardcore gamer, this mode is optimized for performance. If you’re recording software that uses a lot of GPU, try using Game Recorder for a smoother result.
Conclusion
iTop Screen Recorder proves that powerful software doesn’t have to be complicated or expensive. Its intuitive design puts professional-grade recording, annotation, and editing tools right at your fingertips. By following this guide, you’ve learned how to navigate its interface, configure optimal settings, and utilize its fantastic features to create clear, engaging, and professional screen recordings.